Kubernetes Clusters via Hyperstack UI - How-to Guide
Hyperstack makes it easy to deploy, scale, and manage Kubernetes clusters through a streamlined web-based interface. With support for GPU-accelerated workloads, high-speed networking, and dynamic scaling, the Hyperstack UI enables fast provisioning of production-ready clusters for AI and cloud-native applications.
This guide provides comprehensive instructions for deploying Kubernetes clusters using the Hyperstack Console, as well as managing them throughout their lifecycle. Topics include connecting via Kubeconfig, scaling nodes, monitoring cluster health, understanding billing behavior, and more.
Clusters can also be provisioned and managed via the Hyperstack API. For details, see the Kubernetes API Guide.
In this article
- How to Deploy a Kubernetes Cluster in Hyperstack
- Manage a Kubernetes Cluster in Hyperstack
- Cluster Nodes
- Cluster and Node Statuses
- Cluster Capabilities & Restrictions
- Cluster Billing & Data Retention
How to Deploy a Kubernetes Cluster in Hyperstack
Follow the steps below to deploy a Kubernetes cluster using the Hyperstack Console.
-
Start Cluster Deployment
Navigate to the Kubernetes page in Hyperstack and click Deploy a New Cluster to begin the deployment process.
-
Choose Worker Flavor
The flavor defines the hardware configuration of the worker nodes, including the GPU, CPU, RAM, and disk. Select a flavor that meets the performance requirements of your workload. For more details, refer to the Flavors documentation.
Spot worker node flavorsIf you select a
spotworker node flavor (e.g.,A100-80G-PCIe-spot), the underlying instances can be rebooted at any time without notice or automatically terminated due to capacity reallocation.If all worker nodes are terminated, the cluster will be deleted, as Kubernetes requires at least one active worker node to function.
To learn more about spot VMs, click here.
-
Select an Environment
Choose an environment in which to deploy your cluster. If you have not created one yet, follow the steps here.
-
Specify Number of Worker Nodes
Enter the number of worker nodes to deploy in the cluster. A minimum of 1 and a maximum of 20 worker nodes are supported.
-
Choose an OS Image
Select an operating system image that is compatible with Kubernetes.
Recommended:
Ubuntu Server 22.04 LTS R535 CUDA 12.2 -
Select Master Node Flavor
The master node must be deployed using a CPU-only flavor, as it hosts the Kubernetes control plane and is not billed based on compute resources.
Supported flavors:
n1-cpu-small,n1-cpu-medium, orn1-cpu-largeClick here to see hardware specifications of the supported flavors
Flavor Name CPU Cores RAM (GB) Root Disk (GB) Ephemeral Disk (GB) Region n1-cpu-small4 4 100 0 NORWAY-1, CANADA-1 n1-cpu-medium8 8 100 0 NORWAY-1, CANADA-1 n1-cpu-large16 16 200 0 NORWAY-1, CANADA-1 -
Select Kubernetes Version
Choose the Kubernetes version for your cluster. Hyperstack currently supports
1.27.8. For release notes and binaries, click here.Other Kubernetes VersionsTo request support for other versions, contact support@hyperstack.cloud. Custom versions are not currently supported but may be considered for future updates.
-
Select SSH Key
Choose an SSH key to enable secure access to your cluster. If needed, you can create one by following the steps here.
-
Deploy the Cluster
Review all configuration options and click Deploy to launch your Kubernetes cluster.
If you are unable to deploy your VM and receive a message saying that you have insufficient credit, navigate to the billing page in Hyperstack and add credit to your account.
Cluster creation can take between 5-20 minutes, depending on the cluster size and the number of clusters being created.
To connect to your new Kubernetes cluster, follow the steps outlined here.
Manage a Kubernetes Cluster in Hyperstack
To view and manage your Kubernetes clusters in Hyperstack, navigate to the Kubernetes page. Here, you'll find a list of all your existing clusters.
Cluster Kubeconfig��
Access the Kubeconfig for your cluster by hovering over the "⋮" under the ACTIONS column of the Kubernetes page, and clicking Kubeconfig.
Delete Cluster
Hover over the "⋮" under the ACTIONS column of the Kubernetes page and click Delete.
Clusters can be deleted at any time, except when their virtual machines are in the CREATING or BUILDING state. To learn more about cluster statuses, click here.
In addition to deleting the entire cluster, you can scale down by deleting individual worker nodes. This allows you to reduce resource usage and hourly billing costs while keeping the cluster operational.
To learn how to remove nodes, see Delete Cluster Node.
For billing details, see Scaling and Billing Impact.
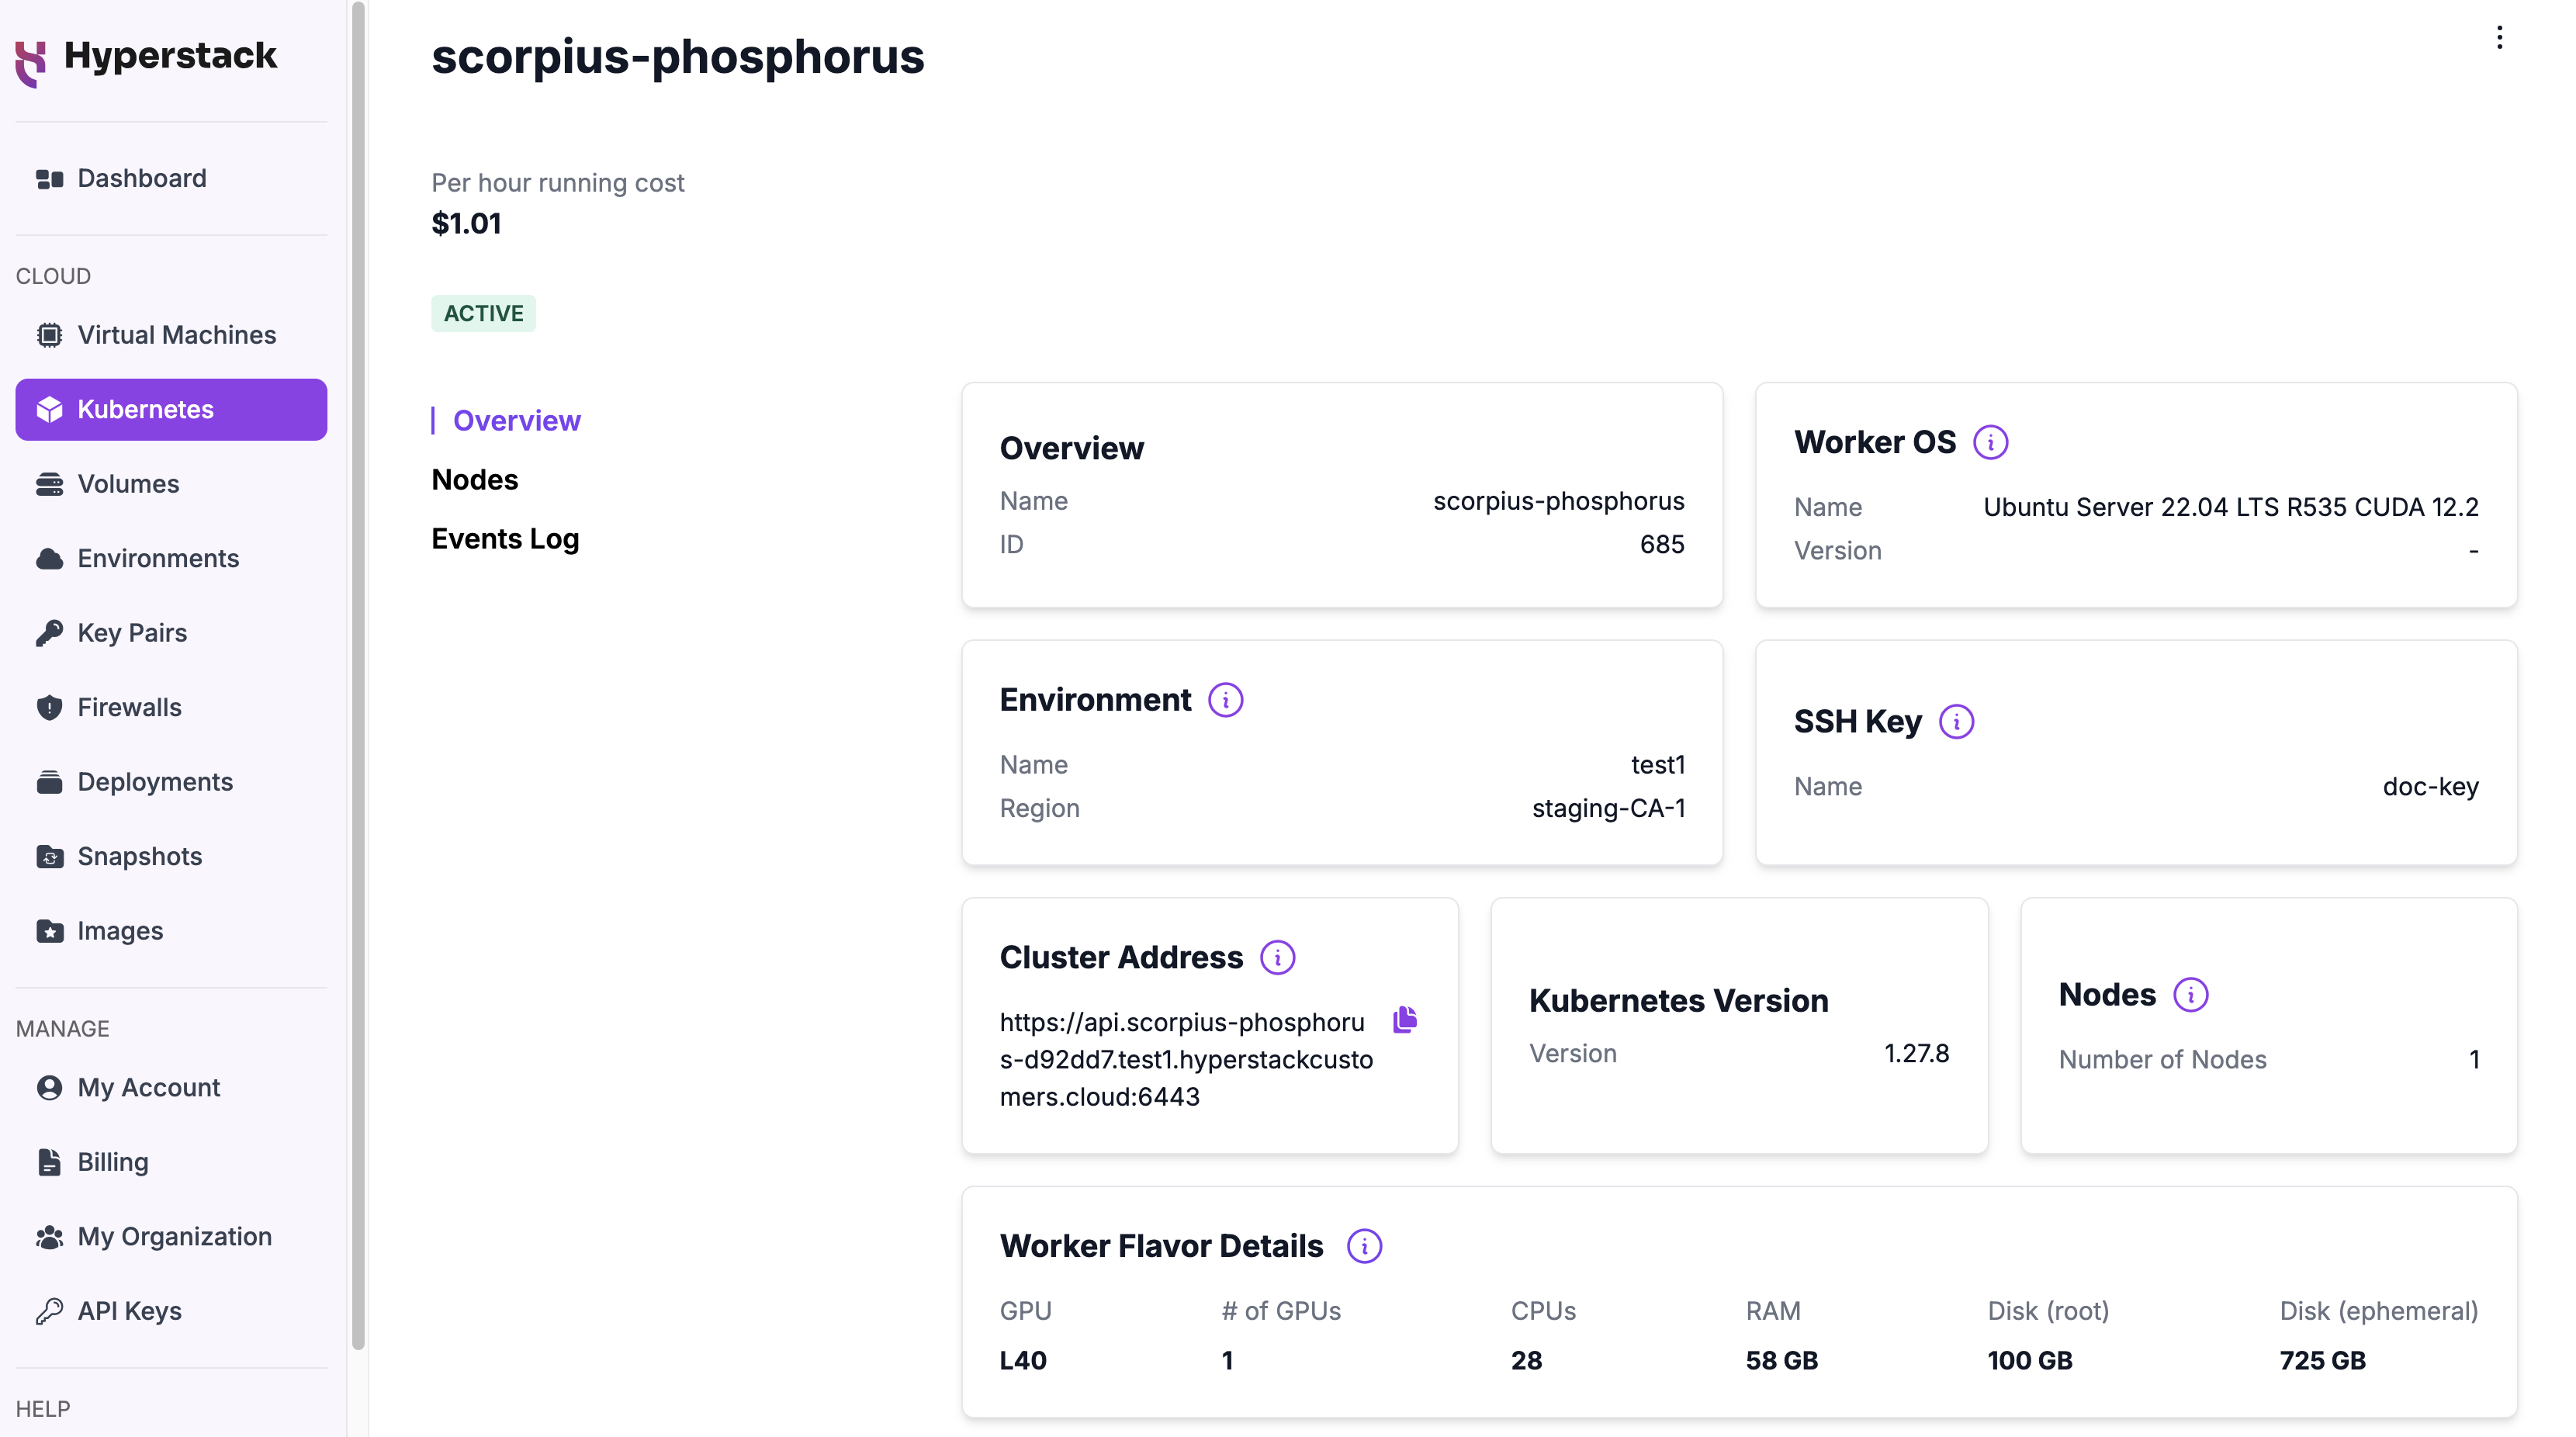
Cluster Overview
On the Kubernetes page in Hyperstack, click the name of a Kubernetes cluster to view its details, including hourly cost, hardware configuration, number of worker nodes, cluster address, and more.
The per-hour run cost for a cluster is displayed only after the cluster reaches the ACTIVE state. To learn more about cluster and node states, see Cluster and Node Statuses.
To understand how hourly running costs are calculated, see Cluster Billing Logic.
Cluster Events Log
To view actions performed on the cluster, go to the Events Log tab. Each entry includes a timestamp, event type, and description for detailed tracking of cluster activity.
Cluster Nodes
Cluster Node Types
Kubernetes clusters in Hyperstack consist of four node types: bastion, master, load balancer, and worker nodes. Each plays a specific role in managing access, orchestration, traffic routing, and workload execution. Learn more about each node type below:
Bastion Node
The bastion node acts as a secure gateway for administrative access to the cluster. It provides a controlled entry point for SSH access, reducing direct exposure of critical components to external threats.
Master Node
The master node runs the control plane, which manages the cluster’s state and orchestrates workloads. It is responsible for scheduling, maintaining application lifecycle states, and ensuring overall cluster stability.
Worker Nodes
Worker nodes handle the actual execution of workloads by running containerized applications. Each worker node is equipped with Kubernetes components such as Kubelet and a container runtime, allowing it to process scheduled tasks efficiently.
Load Balancer Nodes
Load balancer nodes distribute incoming traffic across worker nodes to ensure efficient resource utilization and high availability. They play a crucial role in managing network traffic and optimizing cluster performance.
Cluster Nodes & Scaling
On the Cluster Overview page, click the Nodes tab to view information about each node in the cluster, such as role, status, and IP address. You can also scale the cluster by adjusting the number of worker nodes as needed for your workload.
To add or delete a worker node, all existing nodes must be in the ACTIVE state, and scaling requests must be completed one at a time—concurrent node changes are not supported. To learn more about cluster node statuses, click here.
Nodes are also listed as individual virtual machines on the Virtual Machines page.
To understand how scaling affects hourly billing, see Scaling and Billing Impact.
Add Cluster Node
To add worker nodes to an existing cluster, go to the Cluster Overview page, open the Nodes tab, and click the + Add Nodes button. Specify the number of worker nodes you want to add, and confirm the action.
Delete Cluster Node
To delete a worker node from an existing cluster, navigate to the Cluster Overview page, open the Nodes tab, click the trash icon next to the worker node you want to remove, and confirm the action.
A cluster must have at least one worker node at all times. If your cluster only has one worker node, it cannot be deleted until another worker node is added.
Before deleting a node in Hyperstack, remove it from Kubernetes to prevent orphaned resources:
kubectl drain <node-name> --ignore-daemonsets --delete-emptydir-data  # Remove running workloads from the node
kubectl delete node <node-name>  # Remove node from Kubernetes API
Once completed, you can proceed with deleting the node.
Note: Any data stored on a deleted node will be permanently lost and cannot be recovered.
Cluster and Node Statuses
During deployment, clusters and their nodes progress through a series of statuses that indicate each stage of the provisioning and configuration process.
Cluster Statuses
The following statuses represent the lifecycle of a Kubernetes cluster during and after deployment, along with when billing is applied or not:
| Status | Description |
|---|---|
CREATING | The cluster’s virtual machines are being provisioned and booted. |
BUILDING | The cluster’s configuration is being built. |
RECONCILING | Kubernetes and required components are being installed and configured. During this RECONCILING phase, the VMs for worker nodes remain in the PRE-ACTIVE state and are not billed. |
ACTIVE | The cluster is fully deployed, and all components are operational. |
DELETING | The cluster is being deleted. |
Node Statuses
Node statuses reflect the individual provisioning and readiness state of each node within the cluster:
| Status | Description | Billing |
|---|---|---|
CREATING | The node is being created and initialized. | Not Billed |
WAITING | Waiting for public IP assignment to establish connectivity to the VMs through the bastion node. | Not Billed |
RECONCILING | Kubernetes components are being installed and configured on the node. | Not Billed |
ACTIVE | The node is fully configured and ready to run workloads. | Billed |
Billing applies only when cluster nodes are in the ACTIVE status. No charges are incurred while the nodes are in any other states.
Cluster Capabilities & Restrictions
Hyperstack Kubernetes clusters support high-performance container orchestration with GPU-accelerated workloads, dynamic node scaling, high-speed networking, and secure SSH-based access.
However, there are a few features that are not supported when running Kubernetes clusters on Hyperstack:
- Hibernation: Clusters cannot be hibernated and remain active until explicitly deleted.
- Snapshots: Cluster nodes cannot be snapshotted.
- Boot from volume: Clusters cannot be booted from shared or pre-existing volumes.
Cluster Billing & Data Retention
Kubernetes clusters differ from individual virtual machines in how they are billed and managed. This section outlines key behaviors, limitations, and precautions to help you avoid unexpected charges or data loss.
Billing Behavior
Cluster Billing Logic
Clusters are billed based on the total cost of their active virtual machine resources:
- Worker nodes — Billed hourly based on the selected flavor, multiplied by the number of
ACTIVEworker nodes deployed. - Public IP addresses — Two IPs (assigned to the bastion and load balancer nodes) are billed at a fixed hourly rate, regardless of any contracts applied to worker node flavors.
- Master nodes — Not billed; no resource-based charges apply.
Example:
A cluster is deployed with 4 worker nodes (at $1.00/hour each) and 2 public IPs (at $0.00672/hour each), the total hourly cost would be:
- Worker nodes: 4 × $1.00 = $4.00/hour
- Public IPs: 2 × $0.00672 = $0.013/hour
- Total: $4.01/hour
Scaling and Billing Impact
Scaling your cluster by adding or removing worker nodes directly affects your hourly billing. Charges are applied based on the selected flavor of each worker node, and the updated per-hour running cost is reflected in Hyperstack immediately after the scaling operation is applied.
- Adding nodes increases your hourly cost. Each added worker node is priced according to its selected flavor. The cost is added to your cluster's total once the node reaches the
ACTIVEstate. - Deleting nodes reduces your hourly cost. Billing stops as soon as a node leaves the
ACTIVEstate. The total reduction depends on the number of nodes deleted and the flavor of each node.
Example:
Adding 21x A100-80G-PCIeflavor nodes at $1.35/hour each will increase your cluster's total cost by $2.70/hour, effective once those nodes becomeACTIVE.Deleting 1
1x A100-80G-PCIeflavor node will reduce the cluster's hourly cost by $1.35/hour, this change takes effect once the node is no longer in theACTIVEstate.
Stopping Billing (No Hibernation)
Clusters do not support hibernation and will remain active — and billed — until explicitly deleted.
To stop all charges associated with a cluster, you must delete the cluster.
Contracts and Public IPs
Contract Expiration
When a contract expires, the behavior of a cluster with worker nodes under the contract depends on the configured contract policy:
- Delete Policy: Contracted worker nodes are automatically deleted when the contract ends. If no worker nodes remain, the entire cluster will also be deleted, as Kubernetes clusters require at least one worker node to function.
- Keep Policy: Contracted worker nodes are retained and transition to on-demand billing when the contract expires. The cluster remains active as long as your account has sufficient balance to cover the charges.
Clusters will only remain active after contract expiration if the "Keep resources after expiration" policy is enabled. Otherwise, the contracted worker nodes and the associated cluster will be deleted.
Public IP Billing
If a cluster is created with a flavor covered by a contract that includes public IP discounts, standard public IP charges will still apply. Contracts only apply to worker nodes, which do not have public IPs; the required IPs are assigned to the bastion and load balancer nodes and are billed separately.
Cluster Deletion on Zero Balance
Kubernetes clusters are deleted if your account balance reaches zero—even if the cluster uses contracted flavors.
This deletion is permanent and includes all data not stored externally. Ensure your account maintains sufficient credit to avoid data loss.